Download
Pick the file for your computer. You don't need a GitHub account. The latest version starts downloading as soon as you click.
-
Windows (recommended)Windows 10 / 11 (64-bit)Download (.exe)
An installer: just run the downloaded
.exe. Choose this one in most cases.overlaysubs-windows-x64-setup.exe
-
macOSmacOS 13 Ventura or laterDownload (.dmg)
For Apple Silicon (M1 / M2 / M3 / M4). Open the
.dmgand drag the app to Applications. There is no Intel Mac build.overlaysubs-macos-arm64.dmg
-
Windows (MSI)Windows 10 / 11 (64-bit)Download (.msi)
The MSI installs with administrator rights (for all users). It is an alternative for cases such as company-wide deployment that require MSI. Otherwise use the .exe above.
overlaysubs-windows-x64.msi
Checksums (SHA-256): SHA256SUMS.txt. All releases, including older versions: GitHub Releases
Verify the SHA-256 (optional)
This checks that the downloaded file is not corrupted. Compare the printed value with the one in SHA256SUMS.txt.
Windows (PowerShell)
Get-FileHash .\overlaysubs-windows-x64-setup.exe -Algorithm SHA256macOS (Terminal)
shasum -a 256 overlaysubs-macos-arm64.dmgInstall in 3 steps
The first run takes a few minutes to a quarter of an hour to download models. After that, you can start translating right away.
-
Download
Click the file for your computer in the list above.
-
Run
On Windows, run the
.exe. On macOS, open the.dmgand drag OverlaySubs to Applications. -
First-run setup
Launch it and accept the terms → "Check this PC" → "Download models". When that finishes, you're ready.
If Gatekeeper or SmartScreen warns you
The builds are not signed and not notarized (no Windows code-signing certificate; on macOS no Developer ID signature or notarization, ad-hoc signed only). So the OS warns you on first launch (SmartScreen on Windows, Gatekeeper on macOS). That does not mean the app is unsafe. Use the steps below to open it.
Important: Never disable Gatekeeper or SmartScreen system-wide. Use the steps below to allow just this app.
On macOS 15 and later, the right-click → "Open" workaround has been removed, so you need to go through System Settings. Depending on your setup, the message may read "unidentified developer".
Windows: "Windows protected your PC"
- On the blue screen, click "More info".
- Click the "Run anyway" button that appears.
macOS: "cannot be verified" / "was not opened"
- In Finder, right-click (or Control-click) OverlaySubs → "Open" → "Open" in the confirmation dialog.
- If it still won't open, go to System Settings → Privacy & Security and click "Open Anyway" next to the "OverlaySubs was blocked…" message near the bottom.
Usage
Once first-run setup is done, you just start and stop it with a hotkey.
First-run setup
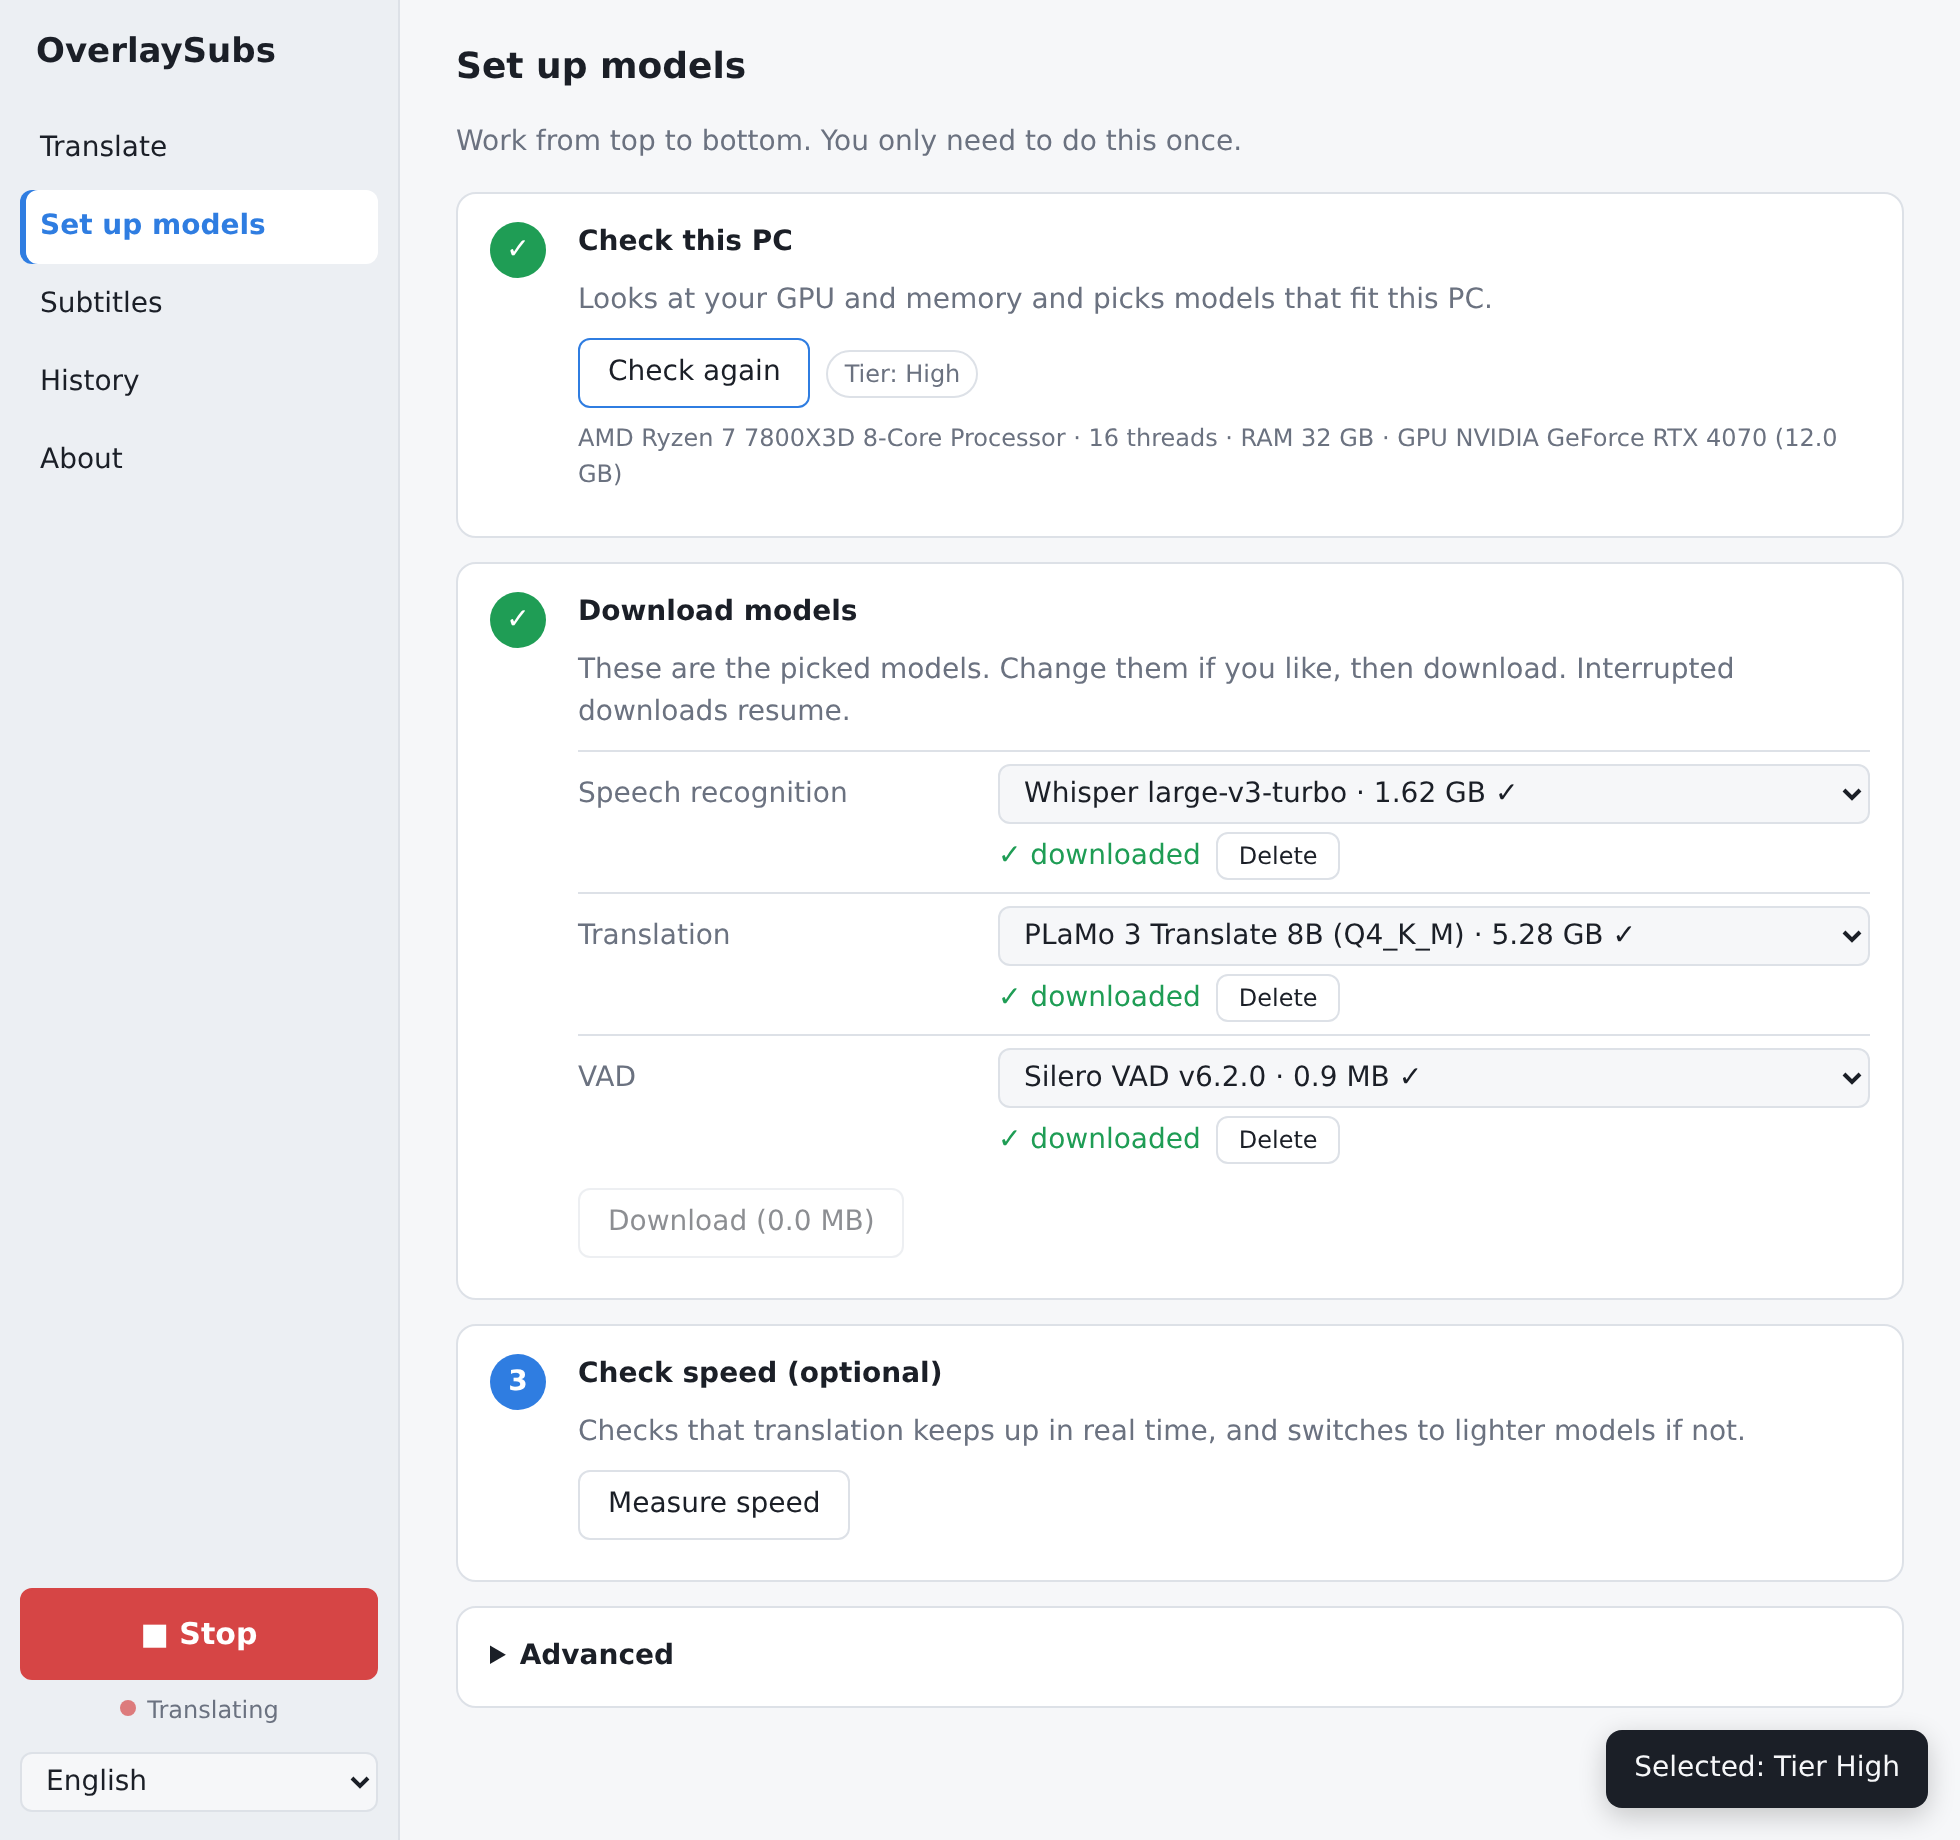
Launch the app, accept the terms, then in "Set up models" go through "Check this PC" → "Download models" (several GB, a few minutes to a quarter of an hour). Optionally run "Measure speed".
Start and stop
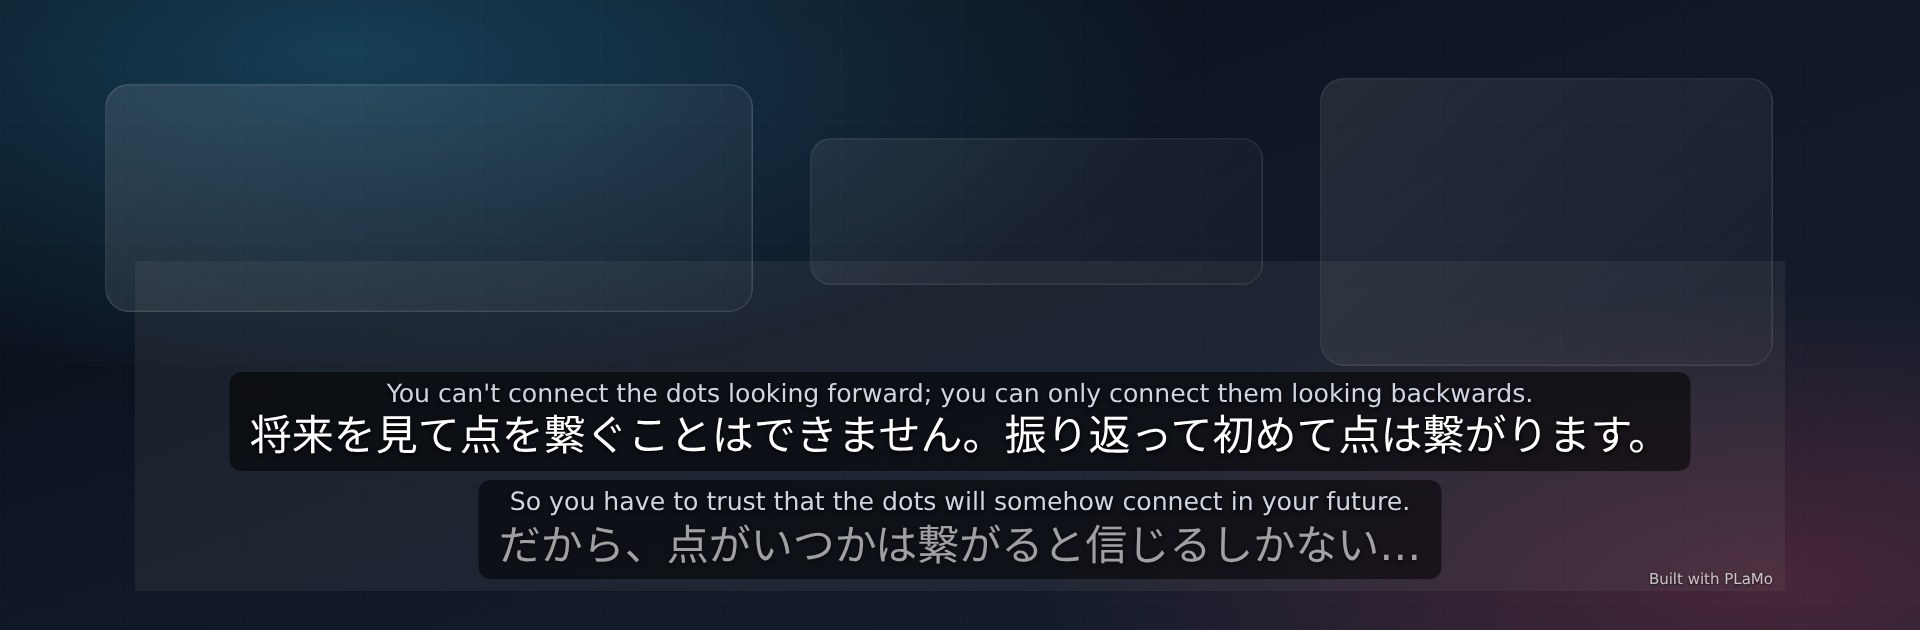
Ctrl+Shift+T (Cmd+Shift+T on macOS) starts and stops translation. You can change the hotkey in Settings.
The overlay is hidden right after launch. It appears when translation starts and hides automatically after translation stops, leaving the last subtitle on screen briefly. You can also show or hide it manually, even while not translating, from "Show subtitles" in the tray menu or from the switch above the Start button in Settings.
Audio input: "System audio" captures whatever your PC is playing. Windows uses WASAPI loopback; on macOS 13+ all apps' audio is captured together via ScreenCaptureKit (no virtual audio device such as BlackHole is needed). The first time, allow OverlaySubs under System Settings → Privacy & Security → "Screen & System Audio Recording" (macOS 15+) or "Screen Recording" (macOS 13–14), then restart the app. Microphone input works on both platforms.
Tray icon and quitting
While the app runs, the system tray / menu bar icon offers "Start / Stop", "Show subtitles", "Settings" and "Quit". Closing the settings window quits the app.
What you can configure
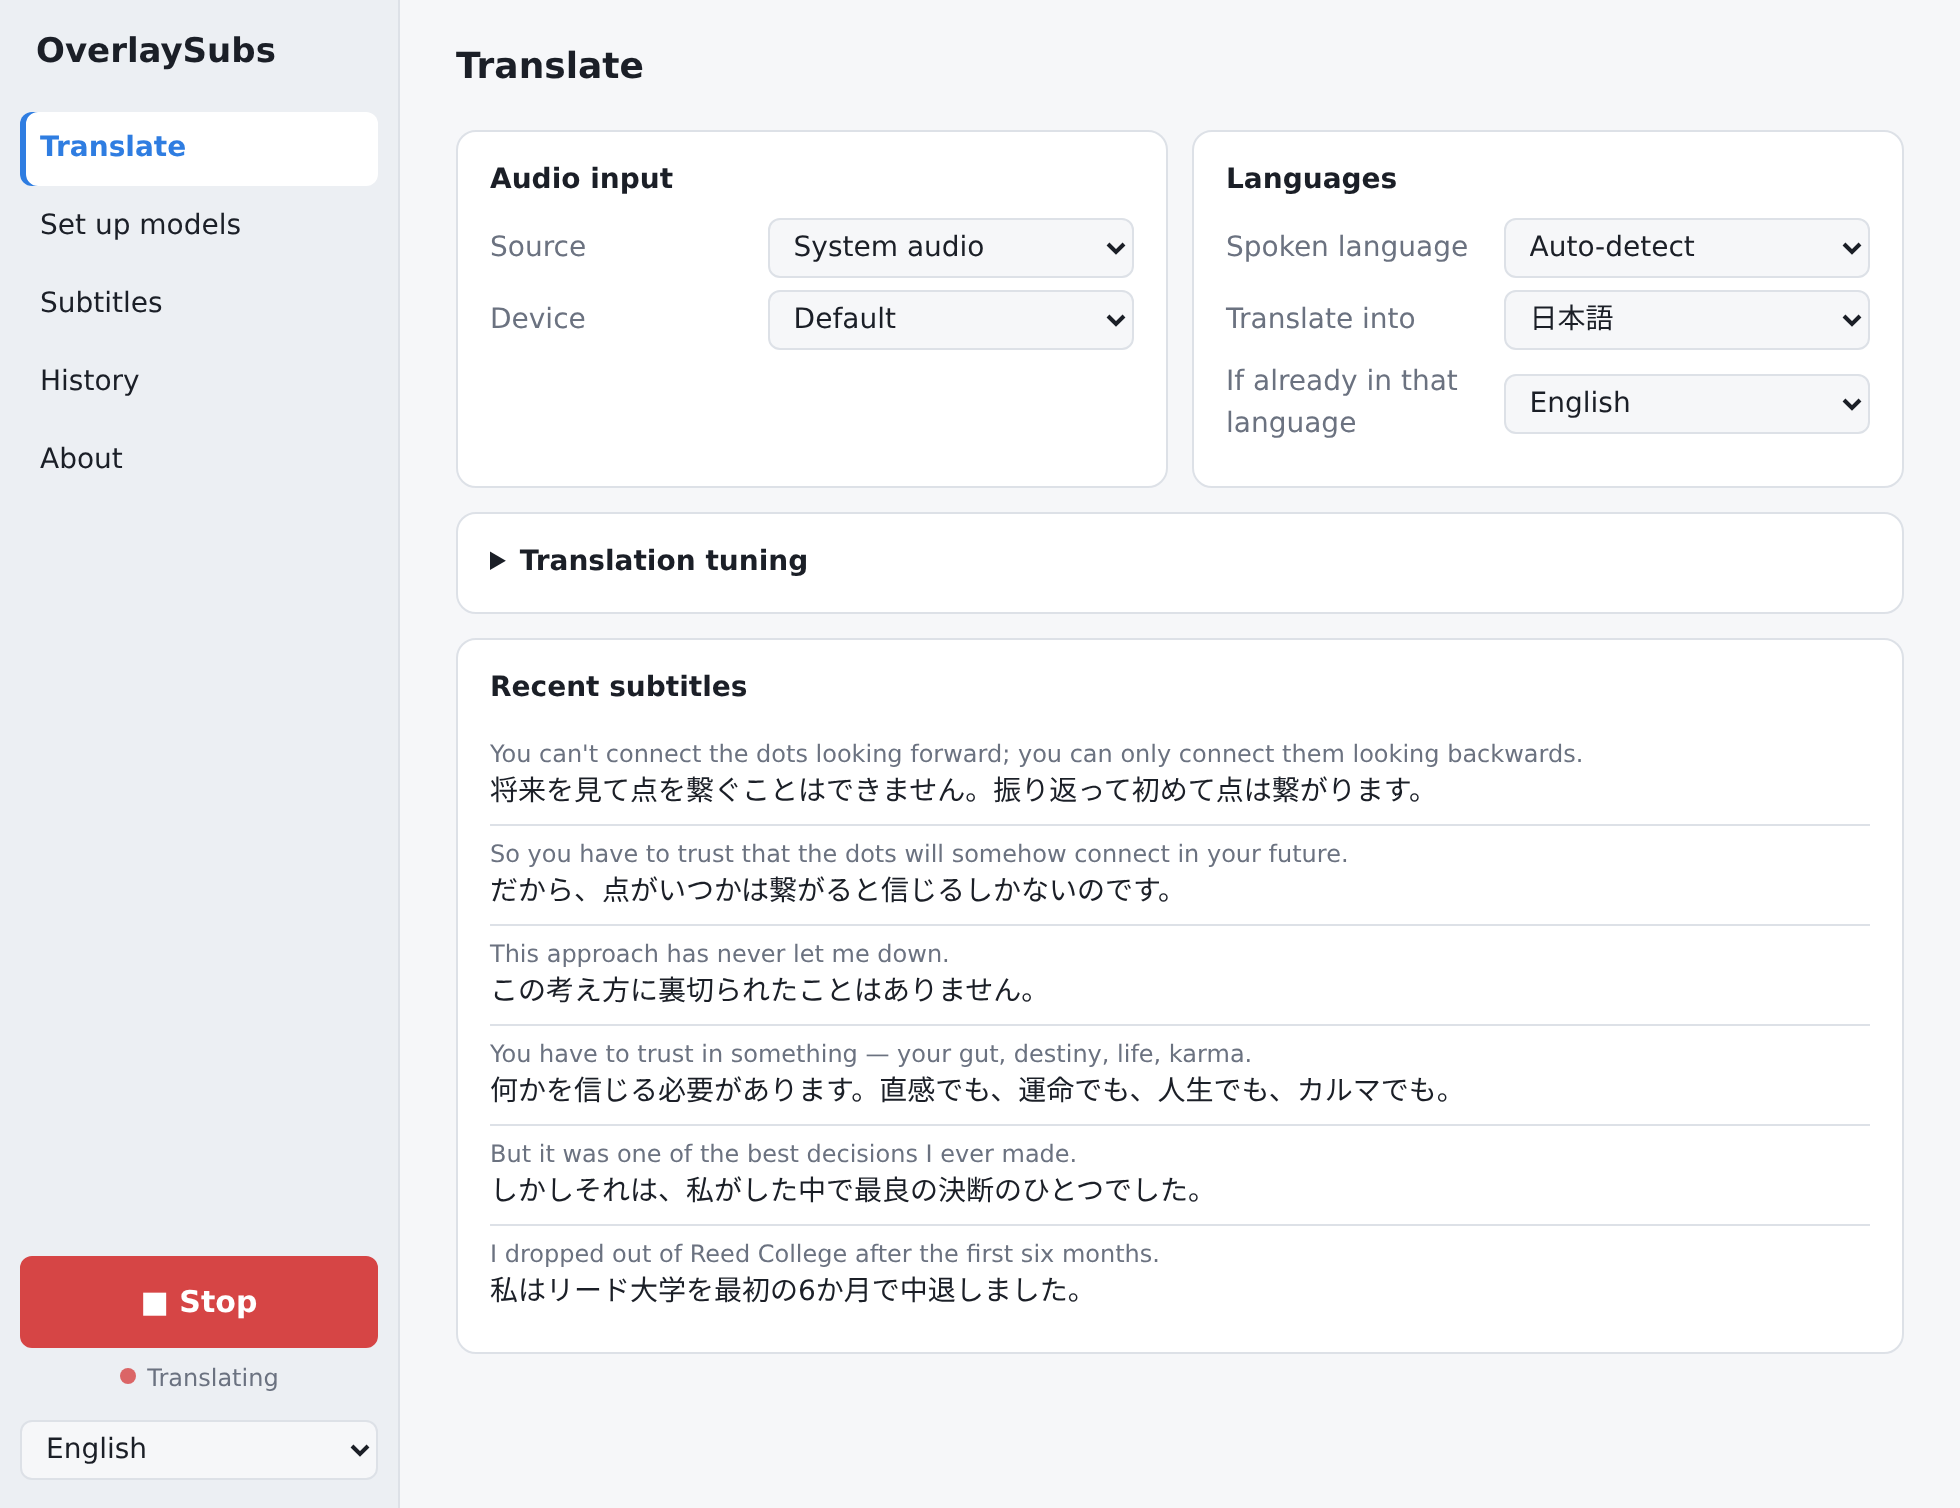
- Audio input: system audio / microphone, and which device. Changes take effect after you stop and start translation again
- Languages: the spoken language (auto-detect or fixed), the target language, and the language to use when the speech is already in the target language. Changes made while translating apply from the next utterance
- Translation tuning: Japanese politeness (polite / plain), glossary (one "source=translation" per line), topic (a hint for the translator), use the previous utterance as context. Changes made while translating apply from the next utterance
- Subtitles: show the source text; background color and opacity for the overlay and for the caption box; font, size, color, weight and line height for the translation; size and color for the original text; caption alignment, vertical position and number of lines; and how long subtitles stay after updates stop. When the lines are taller than the overlay, the scrollbar on the right or the mouse wheel scrolls through them (the wheel moves half a line per notch; with click-through off). While the subtitles keep updating, older lines stay until the line count pushes them out. While translation is stopped, opening this page shows the overlay with a sample caption so you can check your changes live
- Click-through: off by default. When on, mouse input passes to the window underneath (you can't interact with the overlay itself while it's on)
- History: save recent subtitles as text / SRT
- Interface language: English / Japanese / Chinese (Traditional and Simplified)
- Advanced: GPU layers for the translation model (0 = CPU), whether speech recognition uses the GPU, model folder
New version notifications
At startup the app checks once for a newer version and, if there is one, shows an "Update available" banner at the top of Settings with the latest and current version. Click "Open release page" to open the release page, or "Later" to dismiss it (it stays hidden until the next launch). Nothing is downloaded or installed automatically.
Audio, transcripts and translations are never sent anywhere. There is no telemetry. The only network access is the model download and one anonymous GitHub API request at startup to check for a newer release (it sends no account, token or personal data; if it fails, nothing happens). Once the models are downloaded, the app works offline.
Uninstall
Removing the app leaves downloaded models and settings in a folder.
Windows
Settings → Apps → Installed apps → "OverlaySubs" → Uninstall.
macOS
Move "OverlaySubs" from the Applications folder to the Trash.
Leftover data and full removal
| OS | Location |
|---|---|
| Windows | %APPDATA%\io.github.overlaysubs |
| macOS | ~/Library/Application Support/io.github.overlaysubs |
This folder holds the models (models), settings (settings.json), your acceptance of the terms (terms-accepted) and the detected hardware (hardware.json).
Keep it if you don't want to download the models again when reinstalling; delete the whole folder to remove everything.
Requirements
Only Windows x64 and macOS on Apple Silicon are supported. There are no builds for 32-bit Windows, Windows on ARM or Intel Macs.
| Item | Windows | macOS |
|---|---|---|
| OS | Windows 10 / 11 (64-bit) | macOS 13 Ventura or later |
| CPU | x64 (Intel / AMD) | Apple Silicon (M1 or later) |
| GPU | Vulkan-capable GPU + latest GPU driver | Integrated GPU (Metal) |
| Memory | 8 GB or more | 8 GB or more |
| Free space | Enough for the first-run model download (table below) | Same |
The Windows build needs a Vulkan-capable GPU and an up-to-date driver. With an old driver the GPU isn't used and the app is too slow to be practical. It is distributed only via GitHub Releases. There is no auto-update: the app checks at startup whether a newer release exists and notifies you, but never downloads or installs it automatically.
Model download on first launch (several GB)
First-run setup downloads models that fit your PC from Hugging Face automatically. No Hugging Face account or token is needed. Interrupted downloads resume, and files are verified with SHA-256. Once the models are downloaded, the app works offline.
| Tier | Models picked automatically | Download | Free space |
|---|---|---|---|
| High | Whisper large-v3-turbo + PLaMo 3 Translate 8B | ~6.9 GB | 10 GB+ |
| Mid | Whisper large-v3-turbo (Q5_0) + PLaMo 3 Translate 2B | ~2.4 GB | 5 GB+ |
| Low | Whisper small + PLaMo 3 Translate 2B | ~2.3 GB | 5 GB+ |
| CPU | Whisper base + PLaMo 3 Translate 0.8B | ~0.7 GB | 2 GB+ |
Sizes are the sum of the sizes declared in models.json (including Silero VAD, about 0.9 MB). Running "Check this PC" during first-run setup determines your tier from the hardware and picks the models. You can change the Whisper / PLaMo models individually in Settings. The result is cached in hardware.json in the config folder, so later launches show it without probing again; run "Check again" after changing the hardware.
Tier guide: High is 12 GB+ VRAM, Mid is 8 GB VRAM, Low is 4–6 GB VRAM, and CPU is for no GPU or under 4 GB VRAM (Apple Silicon is judged by memory size).
Known limitations
Known constraints of the current version. Future releases may improve them.
- The builds are not signed and not notarized (no Windows code-signing certificate; on macOS no Developer ID signature or notarization, ad-hoc signed only). SmartScreen / Gatekeeper will warn you (see Warnings).
- There is no Intel Mac build. macOS requires Apple Silicon (M1 or later) and macOS 13 or later.
- Windows requires a Vulkan-capable GPU and an up-to-date driver. Without them the app is too slow to be practical.
- On macOS, system audio is captured with ScreenCaptureKit. The first use requires the "Screen & System Audio Recording" (macOS 15+) or "Screen Recording" (macOS 13–14) permission and an app restart (see FAQ).
- Capturing a single app only, or processing system audio and the microphone at the same time, is not implemented yet.
- There is no auto-update. The app checks for a newer release at startup and notifies you, but it never downloads or installs one. Download new versions manually from GitHub Releases (the only distribution channel).
License and terms
The app's code is MIT licensed. The PLaMo 3 Translate translation model is governed by the PLaMo Community License (revised November 9, 2026).
App code
MIT License. The full text is in LICENSE.
Licenses for bundled third-party software such as whisper.cpp / llama.cpp / ggml are collected in THIRD_PARTY_NOTICES.md. The Whisper models (MIT) and Silero VAD (MIT) follow their own licenses.
Terms of use
You must accept them on first launch. The full text is in the OverlaySubs terms of use (日本語), and you can also view them from "About" in the app.
The PLaMo 3 Translate translation model is governed by the PLaMo Community License (Preferred Networks, revised November 9, 2026). Personal and academic use is free. Commercial use, including use inside a company or other organization, requires prior registration with Preferred Networks; it is free while your or your affiliates' most recent fiscal year revenue or sales is 1 billion yen or less, and a separate license agreement is required above that. The license is not bundled with the app; this page and the app link to the official text.
Publishing translated subtitles does not require attribution under the revised license. For books, papers and similar long-form publications, state that PLaMo was used for translation. If you distribute subtitle data (for example as a dataset), state that the license applies to any model trained on it.
FAQ
I've never used GitHub. Can I still install it?
Yes. Just save the file from the download buttons on this page and run it. No account, git or Rust is needed.
Windows says "Windows protected your PC" and won't run it.
This appears because the build is unsigned. Click "More info" → "Run anyway" to start it (see Warnings).
macOS says the app "cannot be verified" and won't open it.
Try right-click → "Open". If that doesn't work, use System Settings → Privacy & Security → "Open Anyway" (see Warnings).
The app launched but I can't start translating.
First-run setup isn't finished. In "Set up models", go through "Check this PC" → "Download models". The start button stays disabled until the download completes. See Usage.
The hotkey doesn't work.
Another app may be using the same keys. Change the default Ctrl+Shift+T (Cmd+Shift+T on macOS) to another combination in Settings (see Usage).
The GPU isn't used / it's slow.
Windows needs an up-to-date Vulkan-capable GPU driver (see Requirements). If it's still slow, switch to lighter Whisper / PLaMo models in Settings, or run "Measure speed" and drop one model size. The CPU models work too, but more slowly.
I can't capture system audio on macOS.
macOS 13+ can capture system audio with ScreenCaptureKit. First open System Settings → Privacy & Security → "Screen & System Audio Recording" (macOS 15+) or "Screen Recording" (macOS 13–14), turn on OverlaySubs, and restart the app. If it is already on but capture still fails, check that you restarted the app and that macOS didn't prompt you from another screen. If you denied the permission or it is unavailable, the app shows a notification saying so. No virtual audio device such as BlackHole is needed.
Does it work offline?
Yes. Once the models are downloaded, transcription and translation work without a network. The startup version check does use the network, but if it can't reach GitHub nothing is shown and nothing else is affected. Audio, transcripts and translations are never sent anywhere.
Can I use it commercially?
Personal and academic use is free. Commercial use, including use inside a company or other organization, is allowed under the PLaMo Community License after registering with Preferred Networks. Registration is free while your or your affiliates' most recent fiscal year revenue or sales is 1 billion yen or less; above that, a separate license agreement is required. The app's own code is MIT licensed. See License and terms.
How do I uninstall it?
On Windows, Settings → Apps → Installed apps → "OverlaySubs" → Uninstall. On macOS, move OverlaySubs from the Applications folder to the Trash. Models and settings stay in a folder, so delete it manually to remove everything. See Uninstall.
I turned on click-through and now I can't interact with the overlay.
While click-through is on, mouse input passes to the window underneath, so you can't interact with the overlay itself. Turn click-through off under "Subtitles" in Settings, turn the overlay on with the switch above the Start button if it is hidden, then drag it into place (see Usage).
How do I update to a new version?
There is no auto-update. When Settings shows a new-version banner, use "Open release page", or download the latest version from the links on this page or from GitHub Releases and install it. Your settings and models are kept (see Limitations).